How To Setup a Music Feed Using a Free Dropbox Account
We're assuming you already have a free personnel Dropbox account setup. If not, head over to Dropbox and signup for a free account.
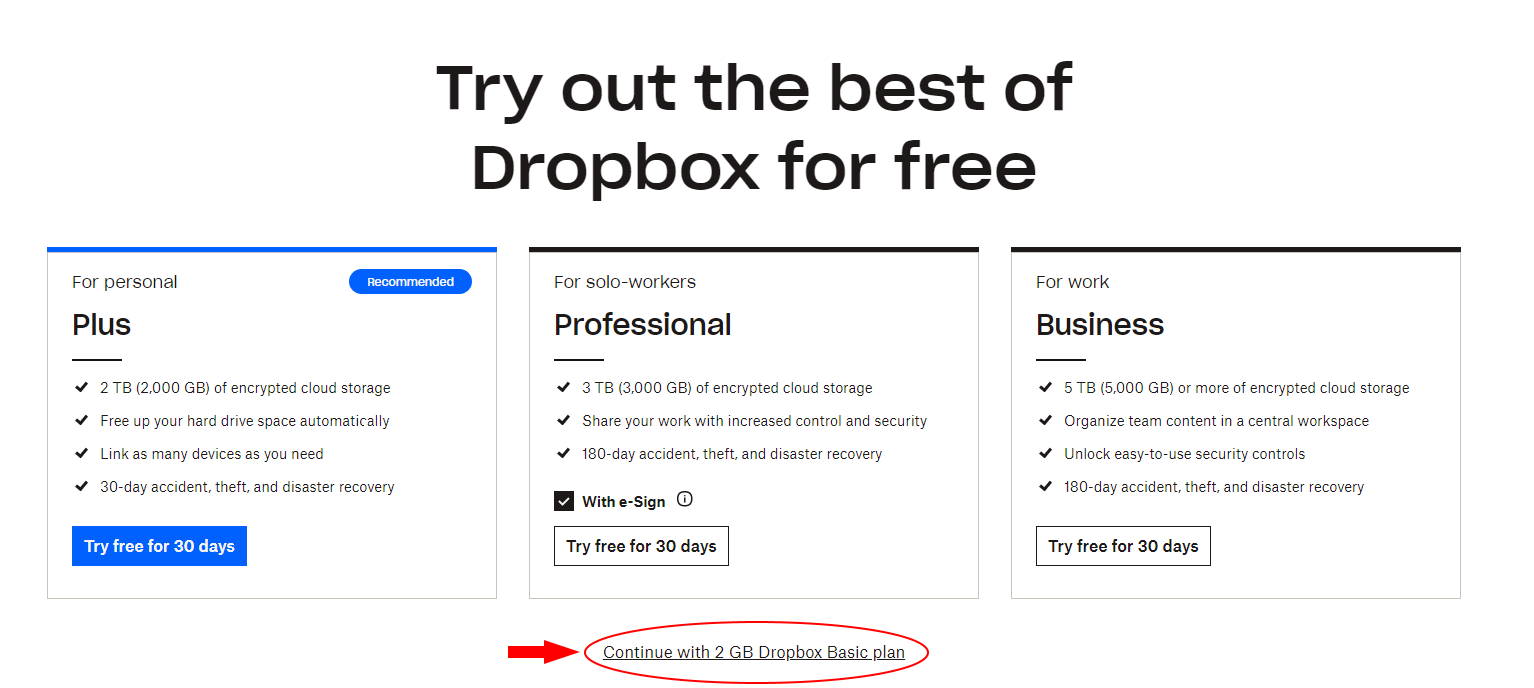
Dropbox is kind tricky, so if you do sign up for the free account, pay attention and click the small link at the bottom.
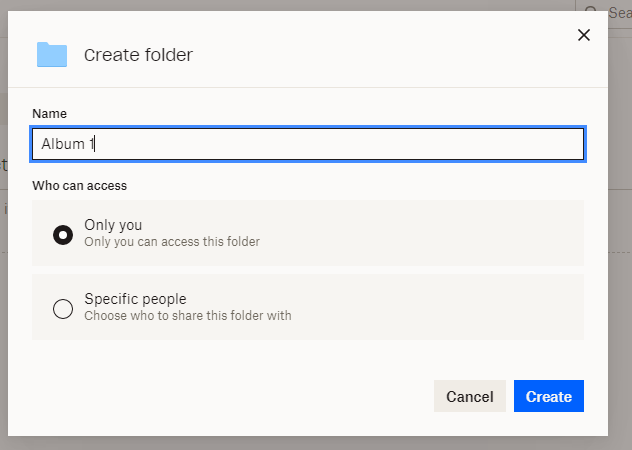
Once you have your Dropbox account set up, Click the Create button, title it the name of your album, keep the access as Only you, then hit the Blue Create button.
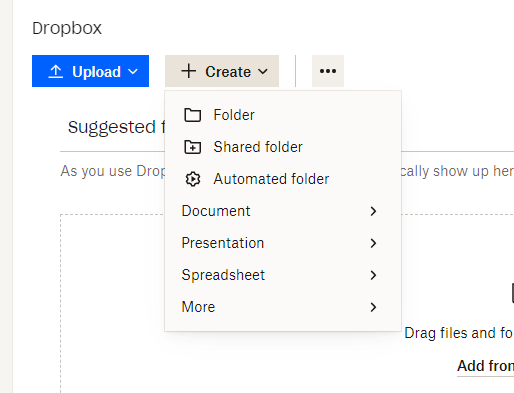
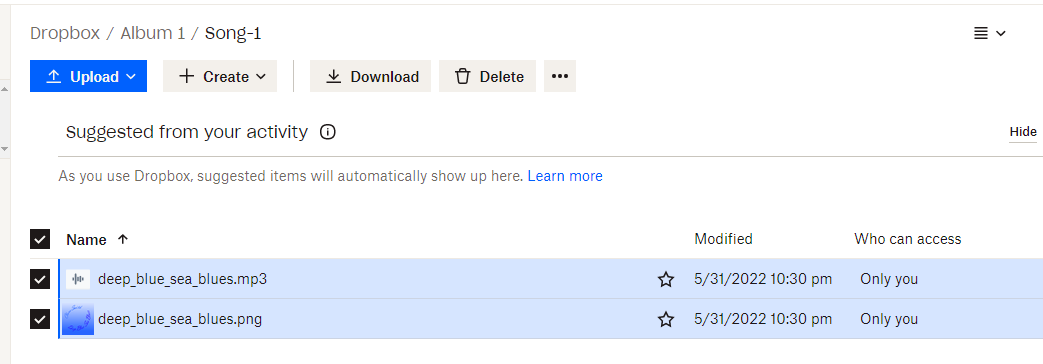
After you've created your album folder, open the folder and create a song folder for each of your songs
Once you have a song folder for each of your songs, grab your mp3 file and the album art file for each song and drop it into it's appropriate song folder.
Now that you have each song set up, upload your album art to the album folder, and you're ready to start creating your RSS feed.
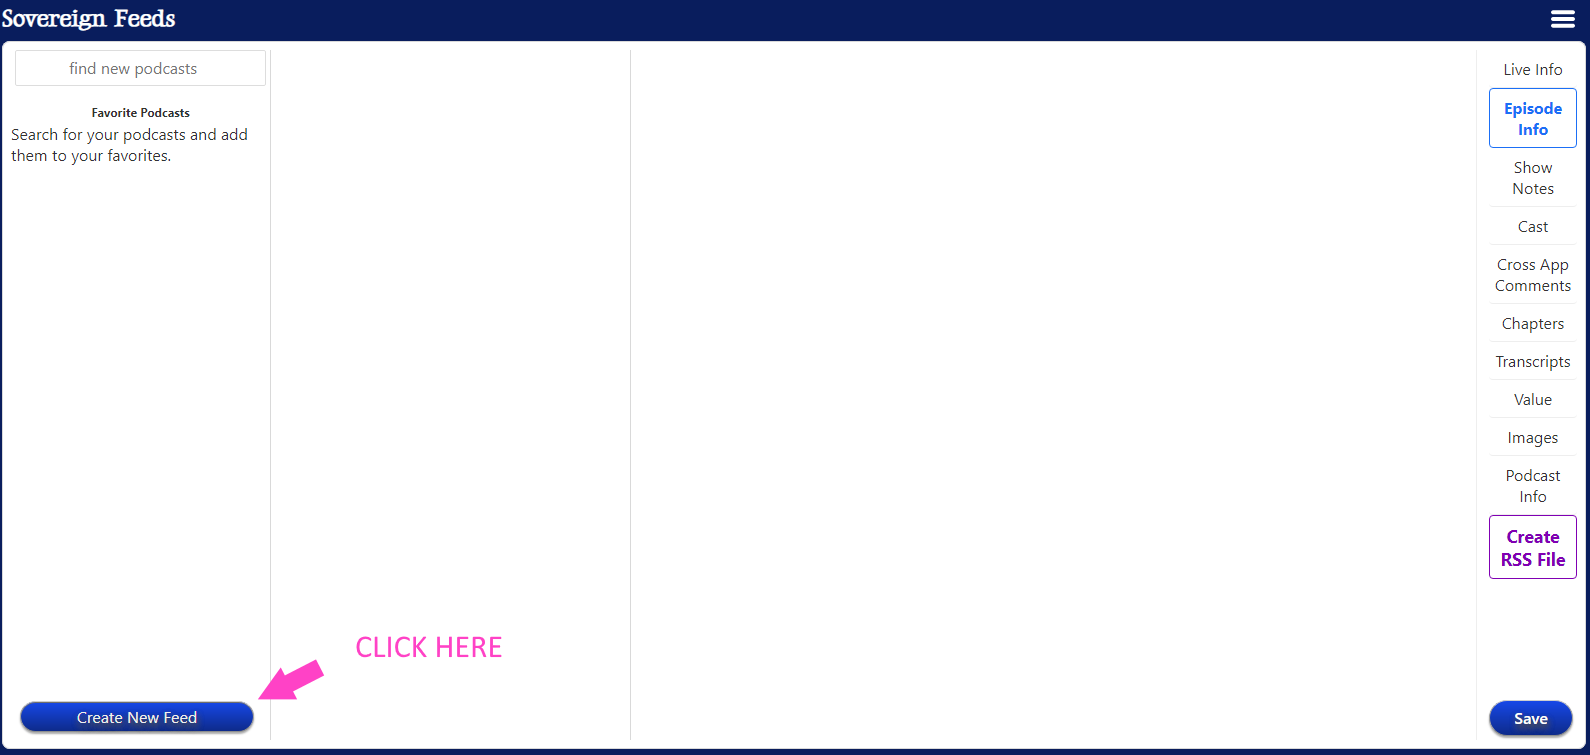
Open up Sovereign Feeds in a new tab so you can work on your feed while following this tutorial.
Click on the Create New Feed button in the lower left hand corner.
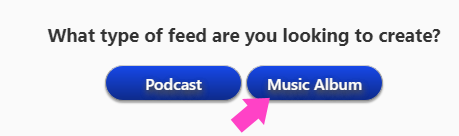
Next click on Music Album to create a Music Feed
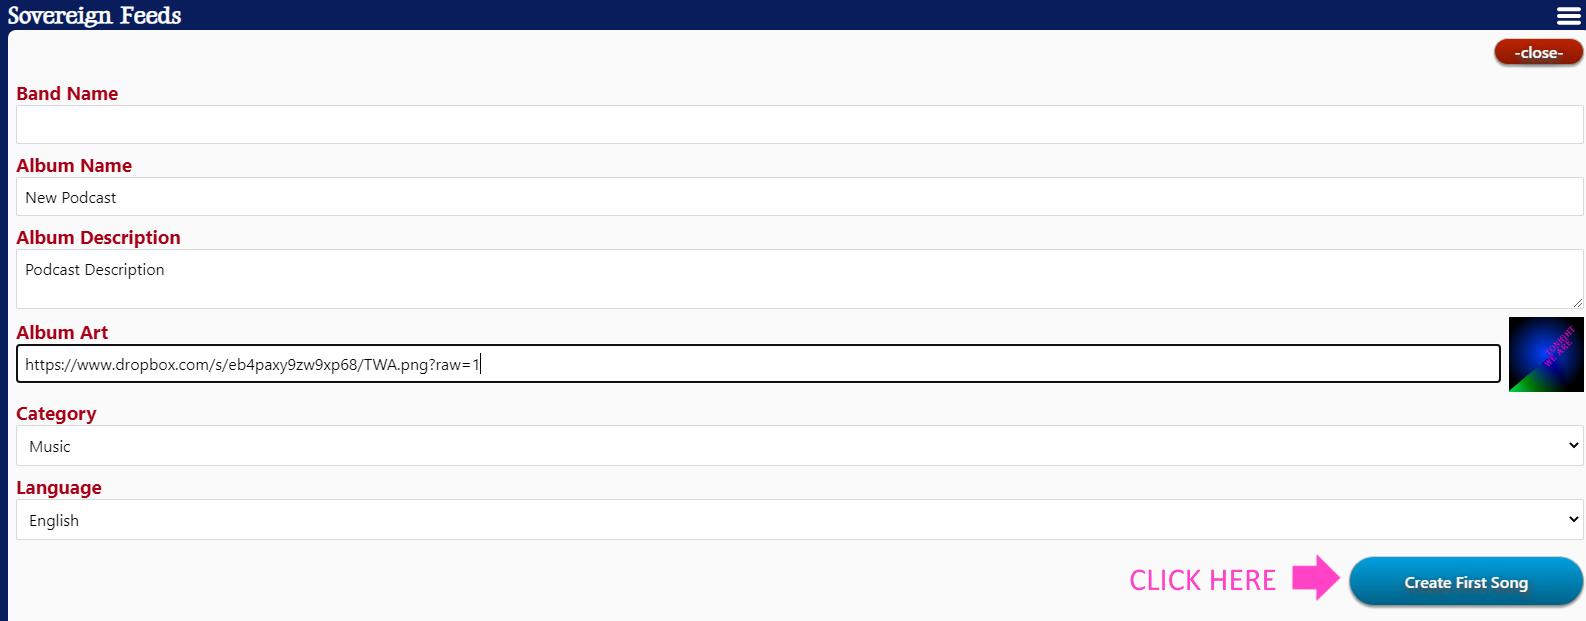
Fill out the Band Name, Album Name, Album Description (this is optional, but should be a short sentence if used), and select Music for the Category.
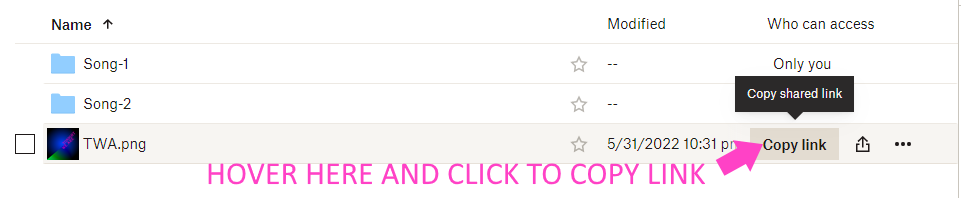
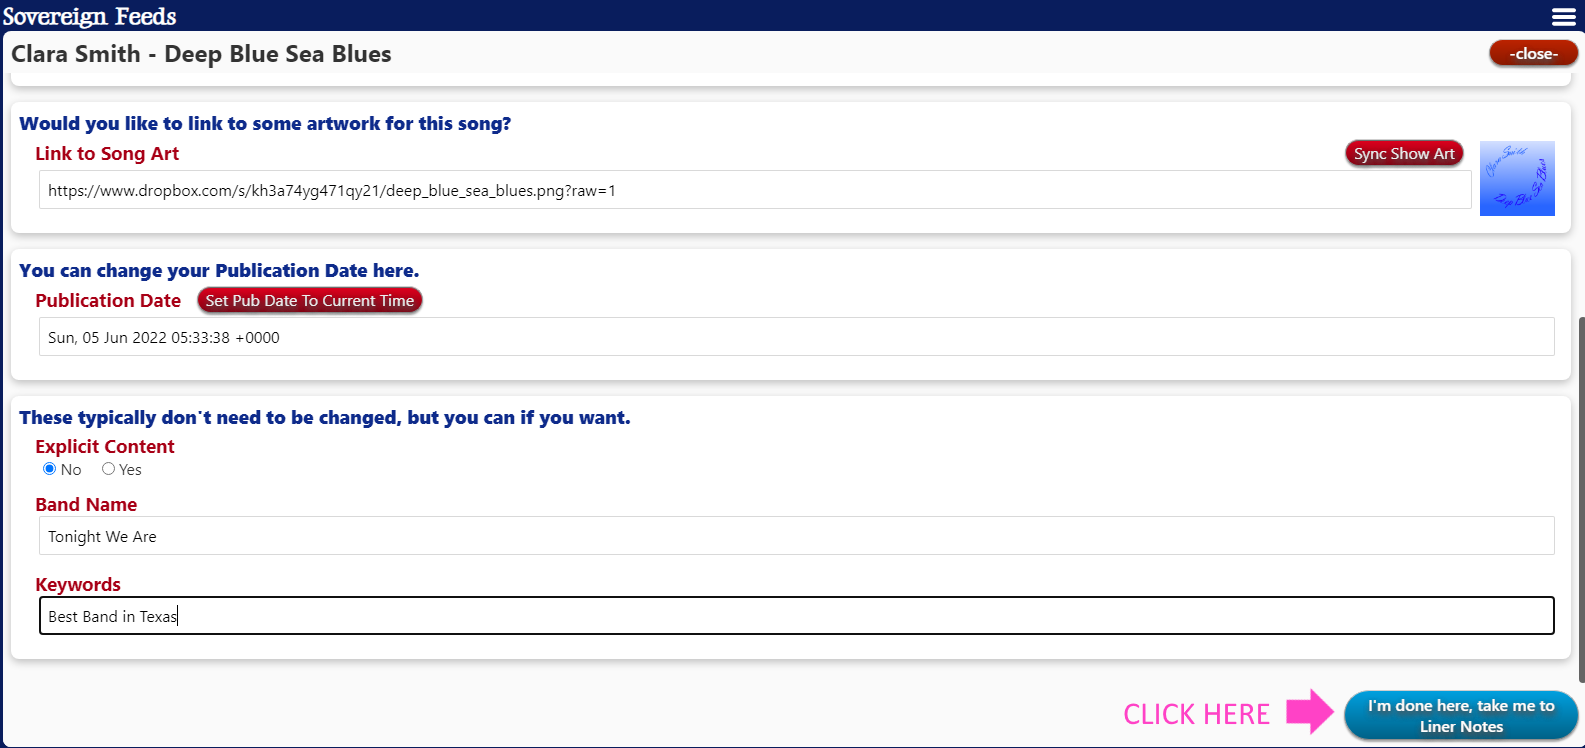
For the Album Art, go to Dropbox in a differnt tab, open your Album folder, and hover your cursor over the Only you text of your album art. Click Copy Link.
Now go back to the Sovereign Feeds tab, and paste the copied link into Album Art. Notice how the link has ?dl=0 at the end?

We're going to change that to ?raw=1. Once that's done, you should see your art work pop up in the image box.

This will have to be done with every Dropbox link, since what we want is the raw file, not a the downloadable file. That's about the only quirk to using Dropbox as our hosting solution.
The album is now set up, so click the Create First Song button.
Back in Dropbox tab, go to the folder for your first song. Just like you did for the album art, hover your cursor over the Only you text of your song mp3 file and copy the link. Switch to your Sovereign Feeds tab and paste that link into Link to Song File. Change the ?dl=0 to ?raw=1.
Go back to the Dropbox hover your cursor over the Only you text of your song artwork file and copy the link. Switch back to your Sovereign Feeds tab and paste that link into Link to Song Art. Change the ?dl=0 to ?raw=1.
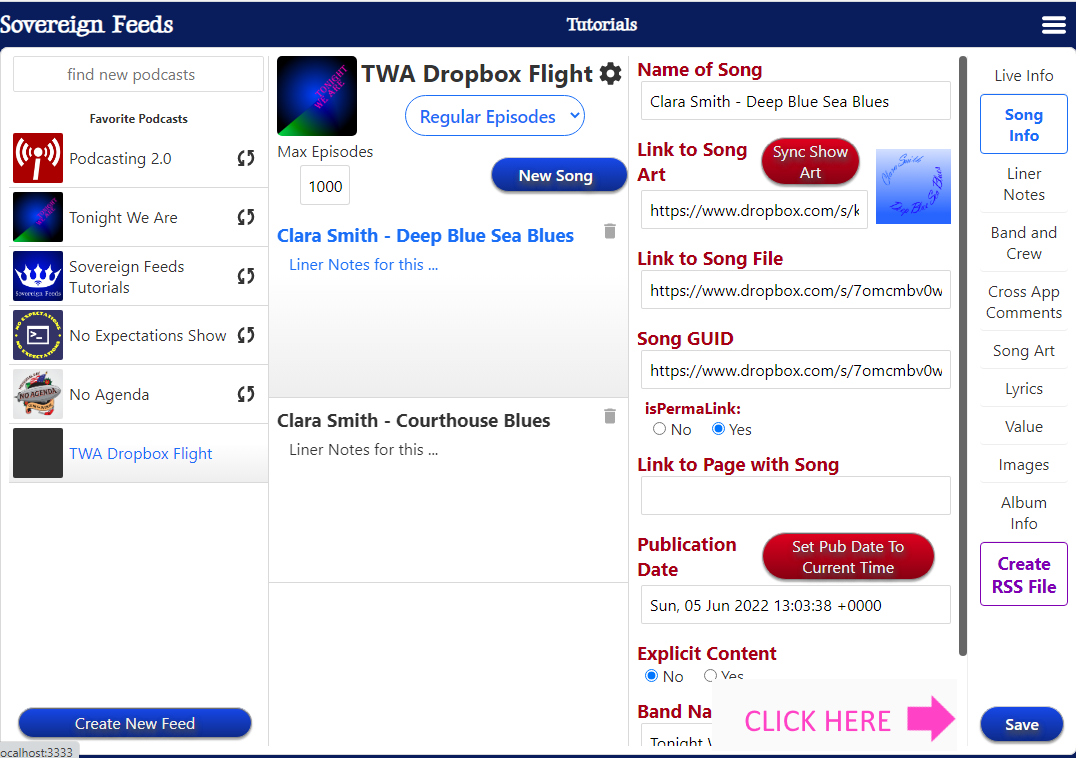
Now we can fill in the rest of the song data, so add the Name of Song
For Song GUID pick a unique identifier for this song. It can be something like Song 1, The Name of the Song, or The Link to Song File (if you use the link to the song file as your GUID, go ahead and change isPermalink to Yes)
If you have a webpage with the song on it, you can add the link to that page to Link to Page with Song, otherwise leave it blank
Don't worry about the Sync Show Art button, that is used primarily by podcaster to update their show art to match their latest episode art, but shouldn't apply to you.
Click the Set Pub Date button to set the Pub Date to the current time.
If your song has explicit content, click Yes on Explicit Content, otherwise click No
Enter your Band Name, and for search engines, pick a few Keywords to describe your song.
Your song's info is finished, so click on the Liner Notes button to continue
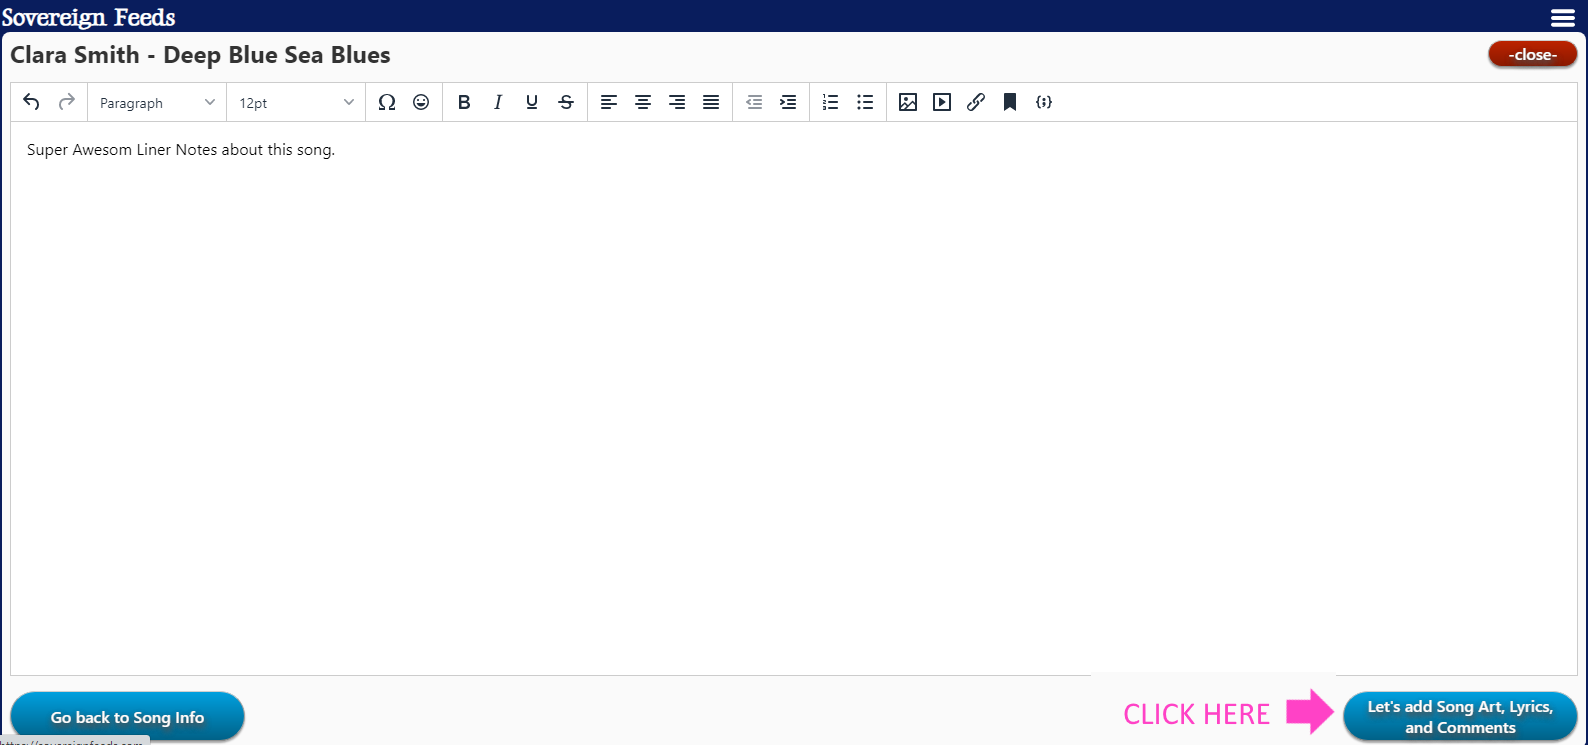
Here you can put your lyrics, your acknowledgements, credits, etc, just like you would in liner notes for an album. Once you're done, click the Song Art, Lyrics, and Comments button.
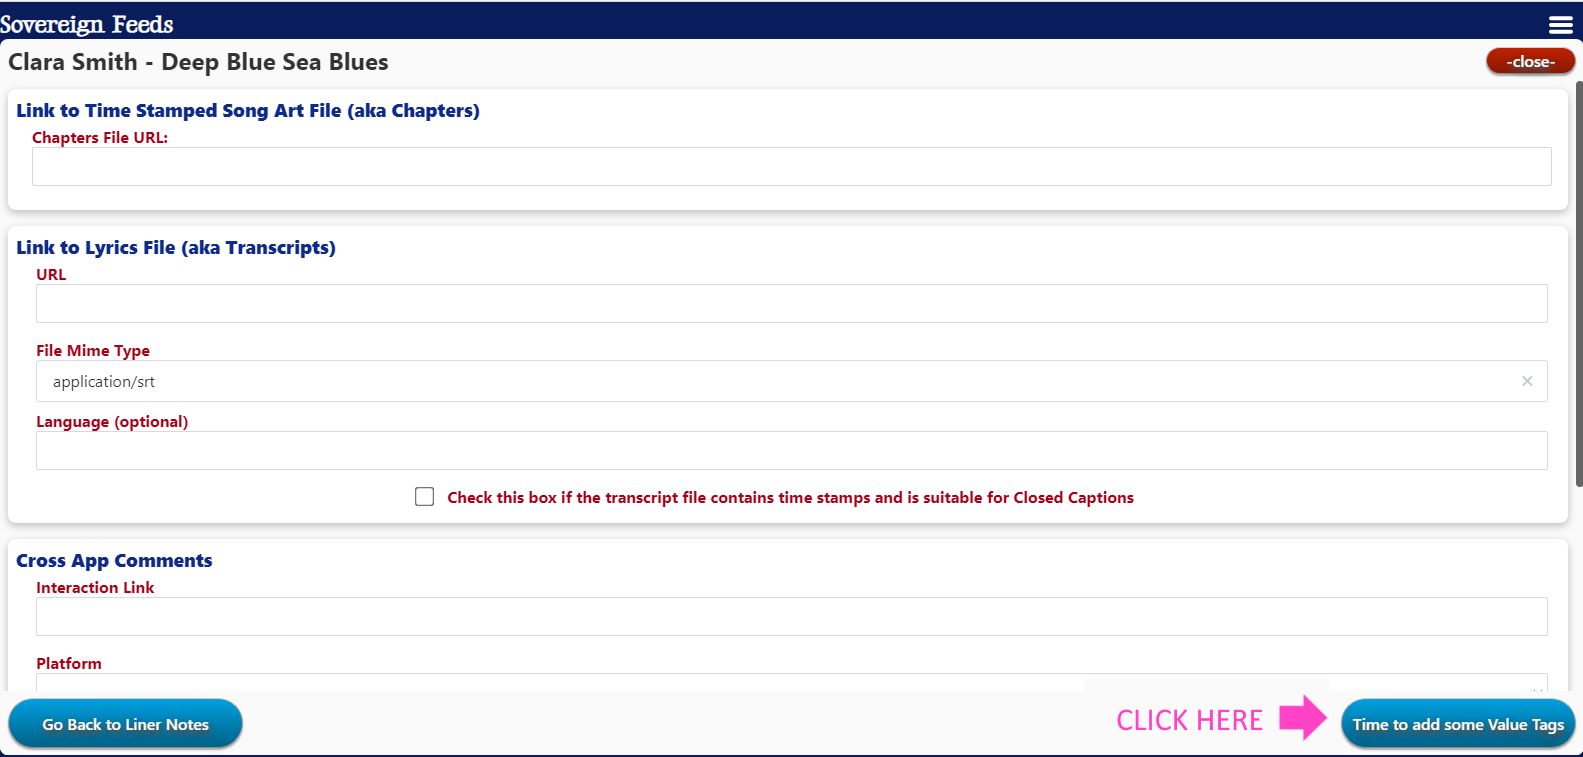
This is more advanced stuff we're going to cover in future tutorials, so for now, click Value Tags button.
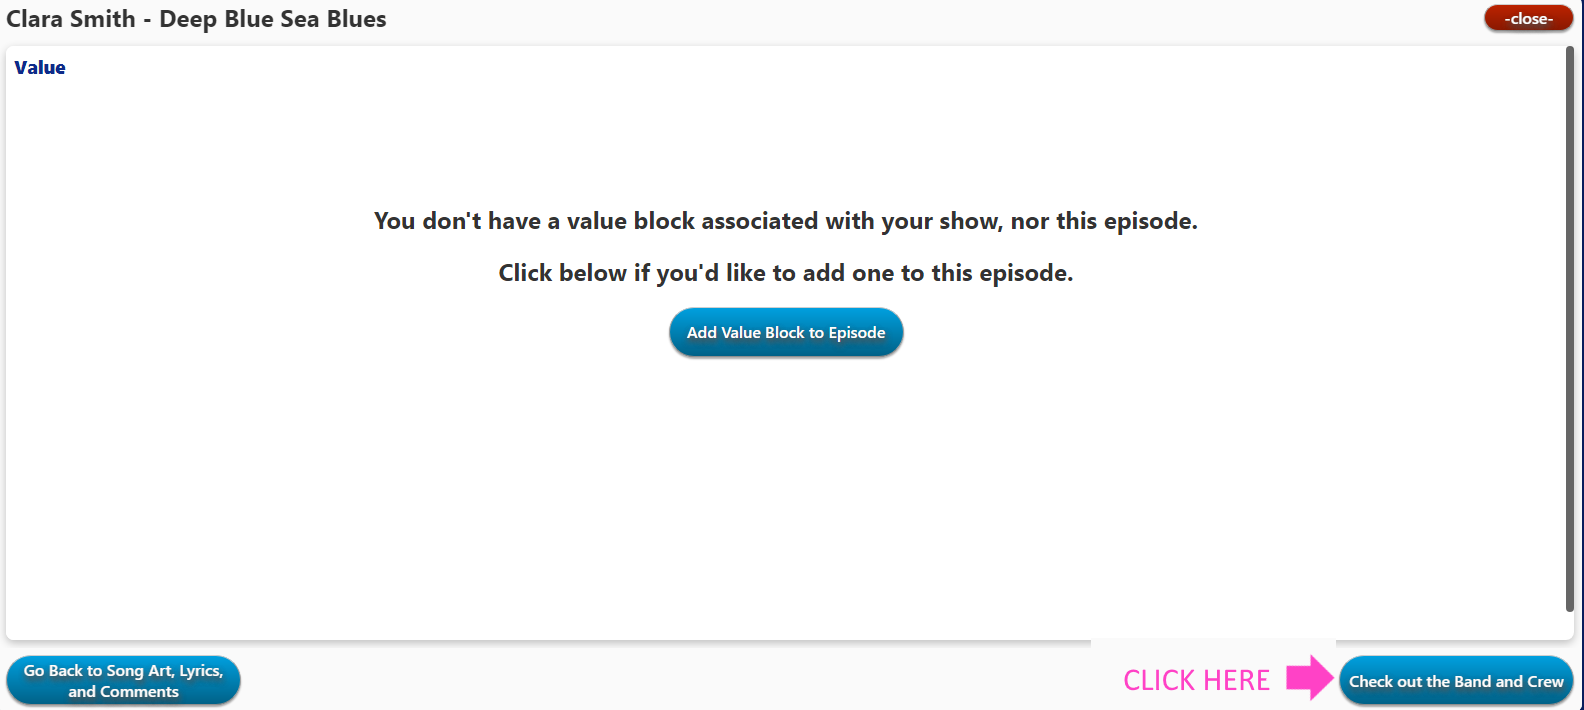
Again more stuff we're going to cover in future tutorials, but this is one you're going to want to come back to, because it's how you get paid. For now though, click the Band and Crew button.
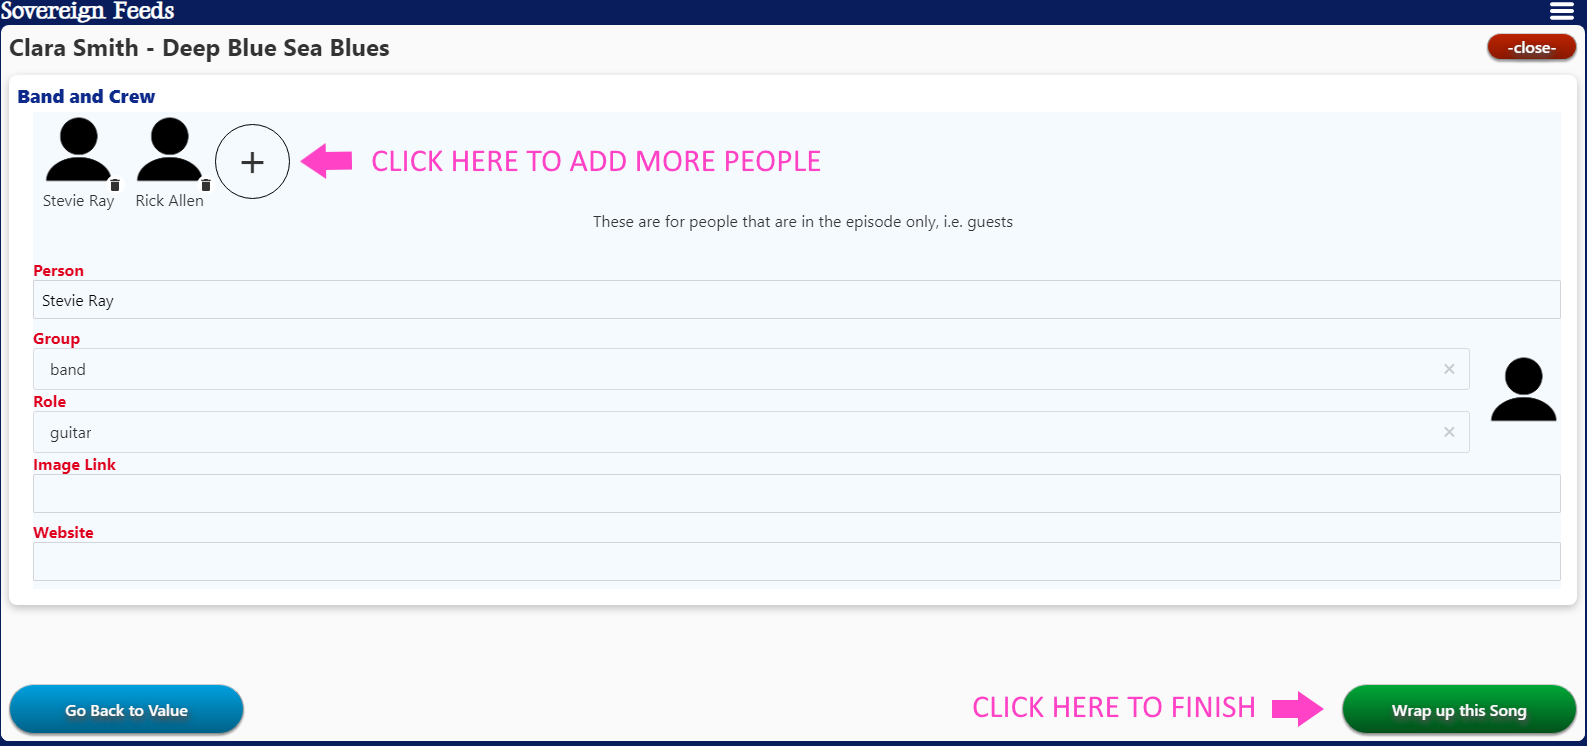
Now YOU can enter the Band and Crew. You can enter the name of the Person, pick the the Group their role falls under, pick their Role, provide a Image Link to a picture of the person (if it's in your Dropbox, don't forget to change ?dl=0 to ?raw=1) and a link to the Website of the person.
If the Group or Role of the person doesn't match what you need, type in your own value, and press Enter
If you want to add more People to the list, just hit the big Plus Sign.
After you're done, press the big green Wrap up this Song button.
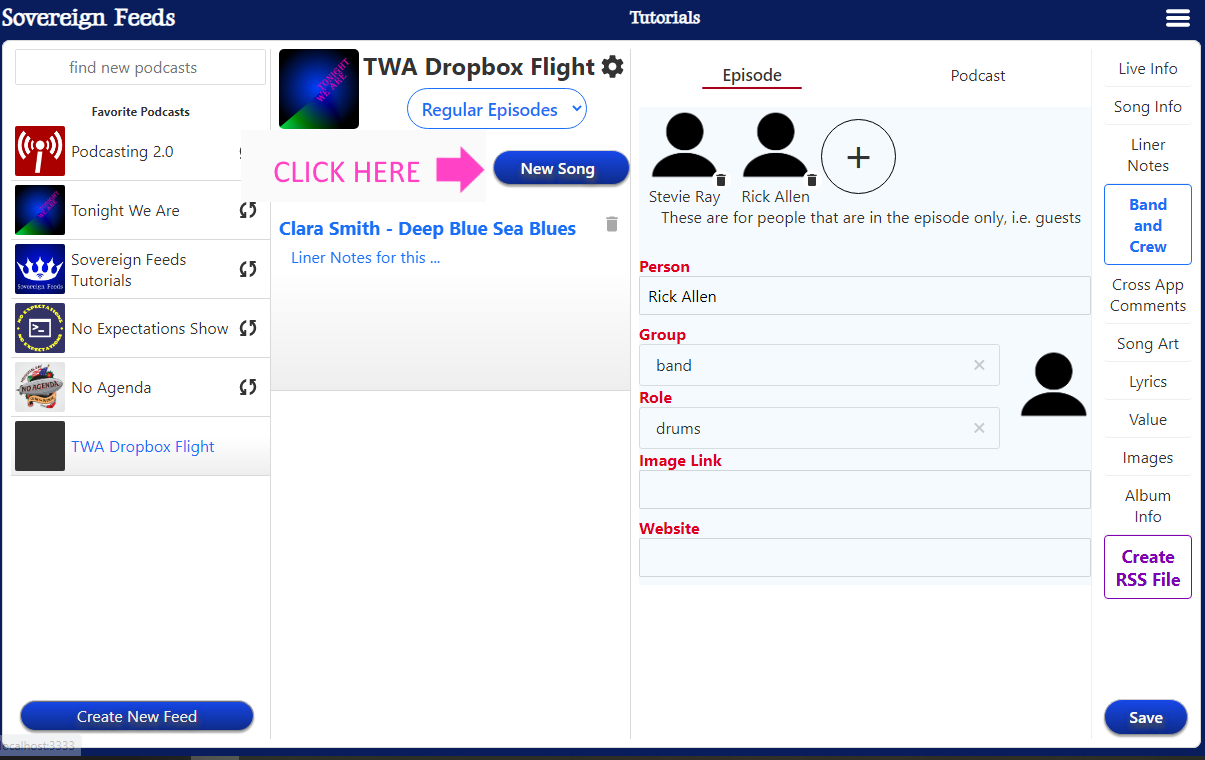
To add a New Song, click the New Song button.
Then click the Copy Previous Song button.
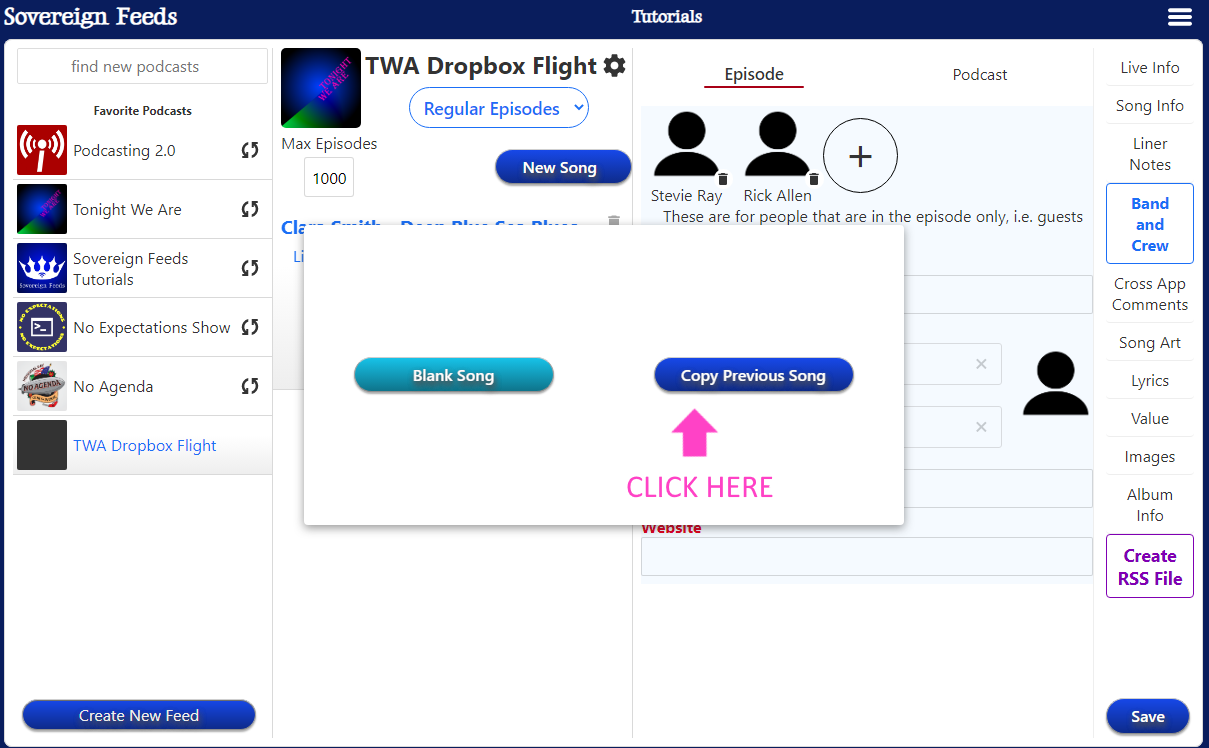
What you'll notice is we're back on the Create a Song Editor but we have all of the same info as the previous song. This conveniently copies tags that are constant for each song. However, it does copy the tags we are are unique to each song. It's easy enough to change the unique tags that this results in less work being done for each song.
These steps are just repeating what we did for the first song, but changing each value to match the song it's associated with. You'll repeat this for every song in your album.
At any point you can save your progress by clicking the Save button or pressing CTRL + S
After you've added all of your songs, click on the Create RSS File